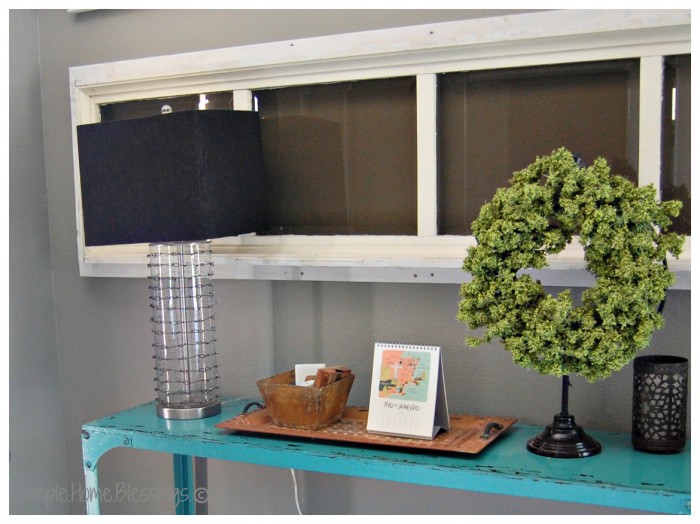
We had a mishap a little while back with the lamp in our entry way. It got broken. It happens – no big deal. And our entry way is relatively dark, requiring a lamp for when guests are over, so they can find their way in and out of the house.
But replacing a lamp is not very easy in our house. My husband has strong opinions about two things decor related: lamps and rugs. It is not that he doesn’t have strong opinions about other things, it is more that he and I see eye-to-eye on everything else. I tend to be more accepting of lighting options in general. He seems to be particular. And though we have been married for almost 10 years, I have yet to discern what appeals to him. He is like a moving target in regards to lamps – I can’t pin him down.
The lamp we had previously was a glass vessel lamp that I used to fill seasonally with random bits of things and D was accepting of it. In fact when the lamp broke, he told me he would approve of a similar lamp.
And then we took a shopping trip to our favorite local boutique, Trestle and I found the LAMP!
You know that moment when you are shopping and you just know that is the item for your home? The gotta have it, can’t live without it kind of item?
And then, you look at the price tag? And slowly come to grips with the fact that you will never own that item.
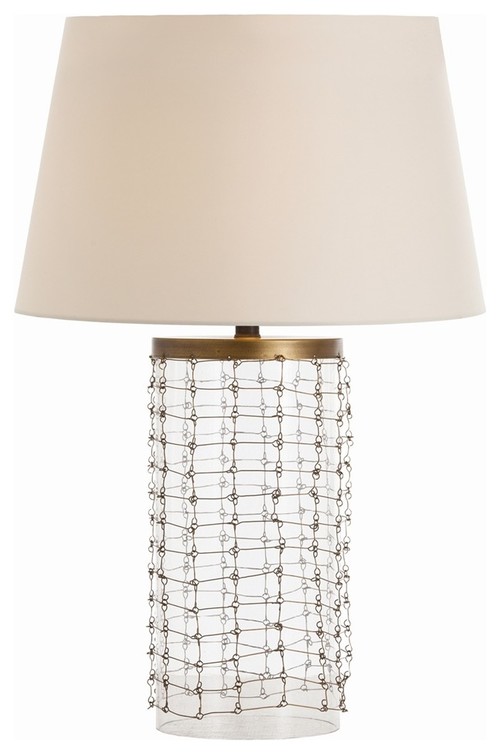
Well, that is the LAMP! And D actually agreed! I love the chain mail look of the lamp – the delicate overlay looks so chic! But I am not a fan of the gold – not really our aesthetic.
And then I thought about it for a long time and decided I could make that! Or something approximating that. And for a lot less!
I am not what I would term a DIY-er.
Not in the least.
But for some reason this project idea just spoke to me. I KNEW I could do it.
So, I shopped around for a little while and picked up all the items I thought I would need for the task. And then I waited for way too long to get it done. But I got it done and I am in love with the result.
Here’s what I did:
DIY Knockoff Chainmail Lamp
Materials
(with affiliate links for your convenience)
- Threshhold lamp from Target
- Harp
- Finial
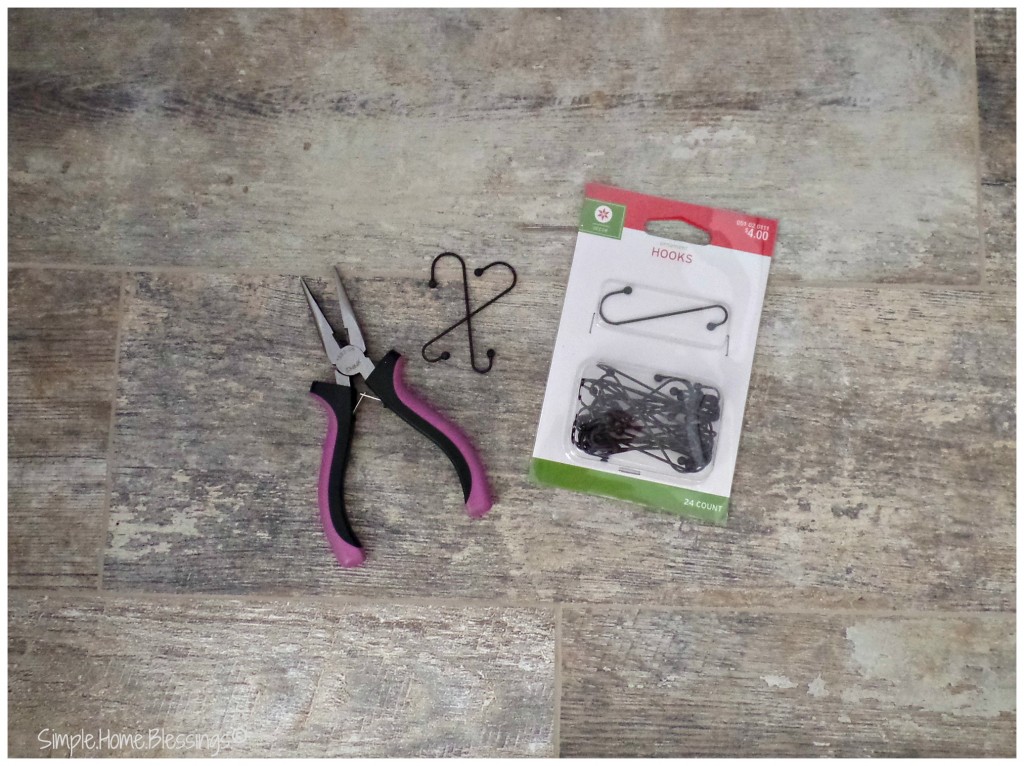
- decorative ornament hangers (from Target on clearance after Christmas)
- needlenose pliers
Procedure
1. The ornament hangers I purchased had a large hook on one end (with a decorative ball) and a small hook on the other end. I decided I wanted to make the chains for the lamp connect by matching-sized hooks. So I matched up one small hook with another small hook and joined them together.
To join them together I held the top of the small hook (with the other hook hanging from the bottom of it) and pulled the long end toward it with the needle nose pliers. I found this bent the hook less, which worked for the look I was going for.
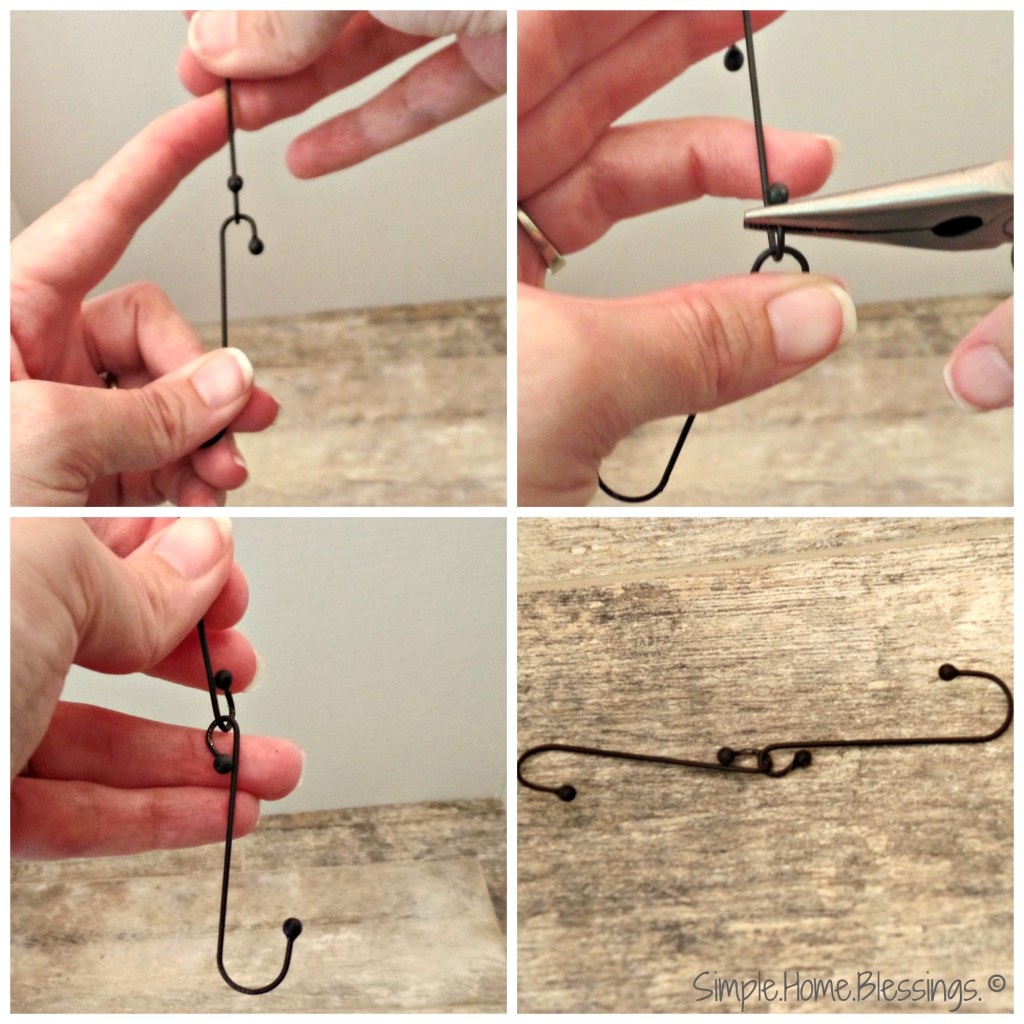
I created chains of 9 hangers each to stretch around the lamp and fit very snug.
2. I measured the height of the lamp base and determined that I would need 14 chains to cover the lamp base, leaving about an inch of space between each chain.
3. Once I got all the chains I needed, I stretched a chain around the lamp base and connected the chain together and joined them to one another using the needle nose pliers. I repeated this process until I had all the chains on the lamp. If the chains were a little too loose to fit snug, I tightened the chains a little bit at each connection to make them more secure.
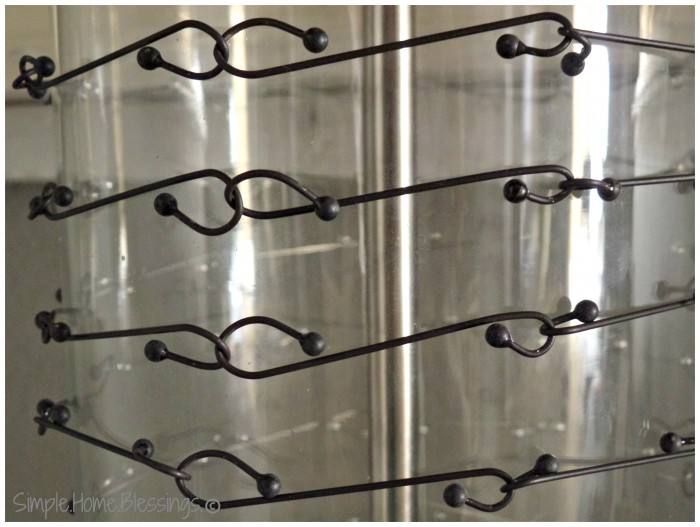
That was it! I couldn’t believe how easy the process was. I do realize that my lamp does not officially have the chain mail look that I loved from the inspiration lamp, but I was very happy with the result and stopped while I was ahead. If you are interested in doing the chain mail look, I don’t think it would be too hard to connect the chains to one another to create a more specific look.

I am still toying with the lamp shade. Finding just the right lampshade has taken a long time and will likely be on the lookout for more in the future. UPDATE: I finally found the perfect shade at Target! It is grey and looks amazing on the lamp! But I love the look of the lamp in our new entry way! It makes me smile to look at it and that is what good design does (in my book)!
And in the end, instead of spending over $500 on the designer boutique lamp, I spent around $60 for our entryway lamp (shopping with coupons and sales, of course!)! I love a good deal and I think this one is GREAT!
Are you a DIY person? What is your latest project? Here are a some of mine:









This Post Has 20 Comments
Oh, it looks fabulous — and $60 versus $500 is, well . . . incredible! Great job!
I’m not a DIY-er yet, but I have aspirations to improve my skills now that my husband and I are moving into our own home. I can’t wait to experiment and get crafty! Budgeting is always an issue, of course, and I’m up for the challenge. In fact, rather than heading out to spend tons of cash on new decor, I’m slowly piecing everything together and getting inspiration for my own creations instead. It feels good!
That’s the way to do it, Meg! When my husband and I got married, we had a dining table with 3 chairs and a full bedframe and mattress! It takes a long time to create the space you love, but then it looks like you want it to because you collected things along the way!
Thanks for stopping by and leaving an encouraging comment.
Whoa! This is amazing. Two things: #1: our husbands might be twins. My hubby and I agree on almost everything interior decor related… But I cannot easily find where we overlap on lighting and rugs. Weird! #2: I am not sure you can ever again say that you are not a DIYer. Cuz now we all know you are. This is so legit! Xoxo thanks for sharing at the Caffeinated Crafters Link Party!
Thanks, April for such an encouraging comment. Good DIYer out the box! I do have lots of other projects set to go, so I have to keep your encouraging words in my mind as I do them! That is so strange about our husband twinning! Maybe it is a guy thing? Hmmm…
Ha!! I totally love your knock off version better. This reminds me of this show I’ve seen on HGTV where there were styles a couple liked but the designer’s job was to recreate that for a much lower price. A lot of her creations and finds were more DIY like this. 🙂
OH, that sounds fun! And thanks, I think I like mine better, too! I certainly like the price better!
I love DIY projects, I just haven’t gotten around to blogging about any of them LOL! YOu did a great job making this your own. I would buy it! Thanks for sharing with Creative Style!
Thanks, April! I love the idea of DIY projects, but often don’t get them done. I am challenging myself to get some done this summer (and write about some of them).
Love the lamp but more importantly I LOVE the wreath on the antique looking stand! I want one!
Thanks, Ronda! I have had it for years, so I can’t give a source on it (don’t know it), but Target sells similar wreath stands each year (during the holidays).
I love it! I need to do something like this for when we re-do our living room 🙂
Stunning, clever, interpretation…Love the lamp shade, too!
Looks good! I love how you took things into your own hands! Stopping by from SITS!
It’s so inspiring to see a fellow blogger be innovative enough to make their own “designer” item. The lamp looks great. Ornament hangers-brilliant!! Thanks for sharing with Pin Your Friday Favorite.
Thanks, Nicki! I still really like the lamp a lot after a few months, so I guess it works for me! Thank you for stopping by and leaving such a kind comment!
I love posts like this! What an awesome project, and totally worth the time vs. the money.
This project is super fun! Thanks for sharing!
I love this idea it turned out great! Found you on bewitchin projects block party following via email or google+ whichever button I find first lol. Great share
Thanks, Mari for the follow and the compliment!